How to Make Sure Avatars Upload to Mixamo
Article is old, merely the steps are still the aforementioned.
Contents
- 1 Quick First - Mixamo and Uploading Avatarsur avatar.
- 2 Footstep Two: Rigging our Model with Mixamo
- 2.one Quick Notation - Missing/Unexpected Textures
- 3 Pace Iii: Importing and Setting our Model every bit a Humanoid
- 4 Stride Iv: Turning our Model into an Avatar
- 4.1 Fixing Missing/Weird Textures
- 4.2 Resizing your Model
- 5 Step Five: Adding the Avatar Descriptor and Uploading to VR Conversation
- v.1 Adding the Avatar Descriptor
- 5.2 Uploading to VR Conversation
Quick Kickoff - Mixamo and Uploading Avatarsur avatar. [ ]
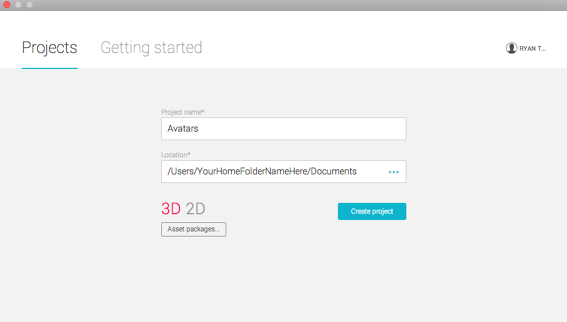
where wolf
Now that Unity has loaded us into the project, we're going to import the VR Chat SDK (The tools that will let you upload your files to VR Conversation). Let's practice that now. To import the SDK, we're going to go upwards into Avails -> Import Package -> Custom Bundle... and so select the VR Chat SDK file in whichever location you've downloaded it to.
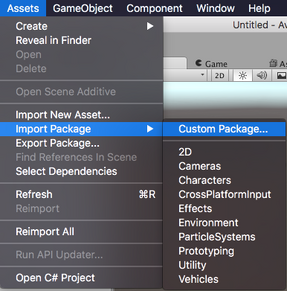
Then a screen will pop up asking which files you'd like to import, we'll just click the import button and allow information technology to load the SDK into the projection.

And now, the SDK has been imported! Let's move to step two!
Stride Two: Rigging our Model with Mixamo [ ]
[If yous already have an avatar rigged and ready to become, you can skip to Pace 3 ]
So we have our model downloaded, which is definitely a great mode to exist! But many models you'll find on the cyberspace, including the i nosotros've downloaded, aren't what people call "Rigged". This means, they don't have marked points to tell VR Chat what to motility so they tin be animated, walk around, and well- be avatars! In the past, this would've been a tricky process for a beginner, but today there's a free service chosen Mixamo that volition attempt to automate that rigging procedure so anyone can accept a bones, rigged model. We're going to run our model through Mixamo so we tin get it into VR Conversation at present.
First, navigate to Mixamo on your web browser. You should meet this:
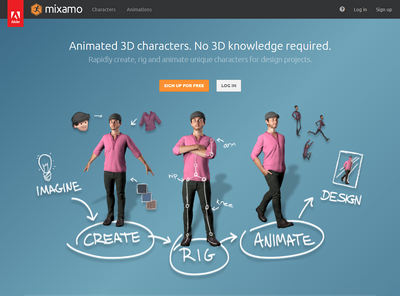
As stated at the top of the page, y'all'll need an account for Mixamo to exist able to use information technology'due south system, then be sure to log into it once ya do.
Next, you'll want to switch to the Animations tab, where you'll see this page once information technology loads
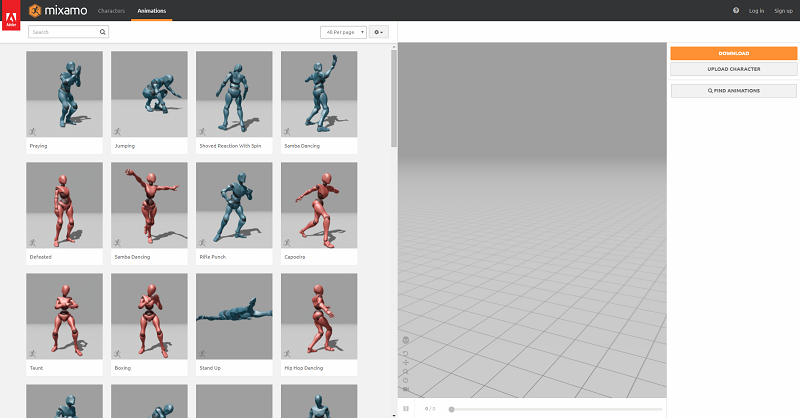
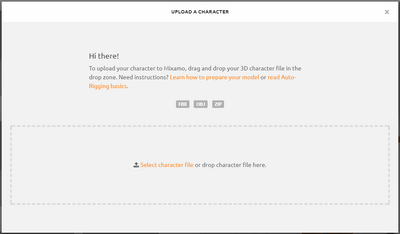
Once you do get to this page, you'll desire to click on the upload button on the right side, and you lot will and so exist greeted with this popup, but earlier we exercise anything, let's briefly take a look at our model earlier we go to upload. Currently Mixamo seems to accepts 2 types of models, those are:
.FBX models, which have all the info inside of them. They're very common and very useful.
.OBJ models, which are likewise very mutual and almost always come with a .mat and a number of image files (those are going to be the "textures" of the model, or the skin details/colors. Without textures, the model would be a dull grayness!)
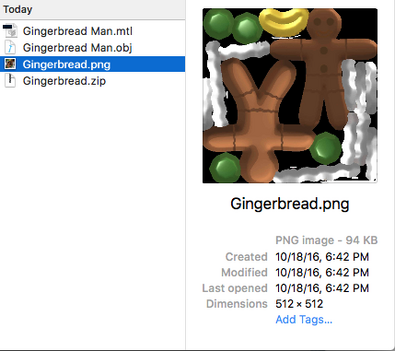
Subsequently we've extracted our model from the .zippo file, we see that it has three files inside.

These are:
Gingerbread Man.mtl (The materials file, which tells the model what to do with the Gingerbread.png textures)
Gingerbread Man.obj (The actual model)
Gingerbread.png (The textures)
If nosotros want this model to show up with its textures in Mixamo, we're going to need to put it into a .zip file. So on Mac, y'all'll merely select those files, correct click, and select "Compress items". On Windows, there are a number of ways to practise information technology. If y'all have Winrar, you'll desire to select the files, correct click, and select "Add to Archive". And then change it from exporting as a RAR to equally a Nada. We'll and then exist dragging it into Mixamo.
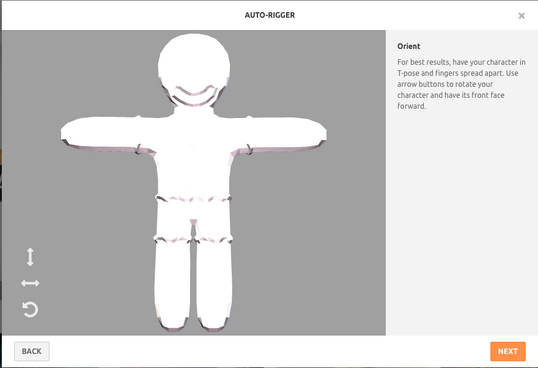
It may take a couple of minutes to process the upload, only once it's done, you'll run across the character in a T-Pose. If the model is in the right position, they'll be facing forepart. You'll want to hit the next button to proceed to the rigging screen.
Quick Note - Missing/Unexpected Textures [ ]
If you've reached this step and discover the model looking strange in Mixamo, for example similar in the screenshot below, you will want to proceed with these steps, and when we're working with the model in Unity, you'll just want to follow the extra step for untextured models. Unfortunately sometimes Mixamo doesn't like certain textures, and will play with them in weird ways. Luckily, information technology'southward very mutual, and very fixable.
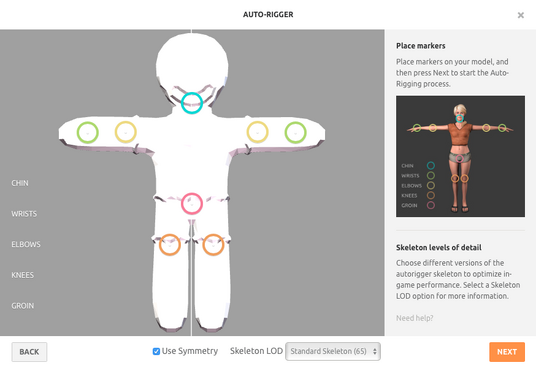
So at present that we've hit next, you're going to see several colored markers, with text next to them saying where they will go. You're going to marker the chin, wrists, elbows, knees, and groin of the model you lot'd like to rig. Notice that when y'all move, for instance, the left elbow, the right elbow volition move with it so that they're mirrored. If the model yous're using isn't completely symmetrical, you can turn off symmetry via the checkbox on the very lesser of the window. Below is a good instance of what our Gingerbread Human will await like in one case his markers are placed correctly.
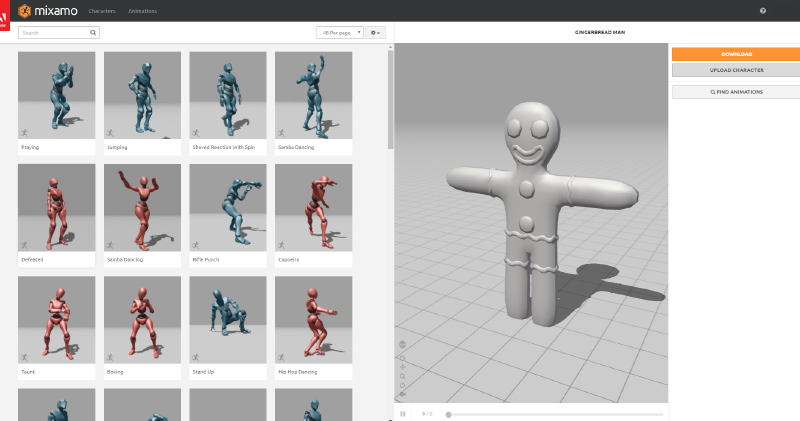
Once we've hit next again, you'll encounter the model spinning around while it processes the new rig settings. And once it's all done, we'll get a neat animation of your model in activeness! If it doesn't expect quite right, endeavor going dorsum and placing the markers ane more time. However, if information technology looks good, you're well on your mode! [If the autorigging doesn't work the first time, you might have to motion the groin placement upward a few inches]
At present to download the model. Just simply click on the Download button on the right and and so another window will appear for the settings, you tin can just leave it as FBX and T-pose, just click the download button and y'all're good to get!
Pace Three: Importing and Setting our Model as a Humanoid [ ]
Okay, so we've washed some great things so far! We've taken an unrigged model and rigged it, and put the VR Chat SDK into our blank Unity project! At present is where nosotros go to see some real action.
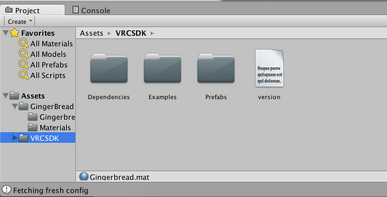
So open back up your empty Unity projection, and nosotros're going to go down to the "Projection Browser" at the very bottom. At this point y'all should already take a "VRCSDK" binder down there, and if you've saved your scene (File -> Salvage Scene), you may besides accept the saved scene file in there like this:
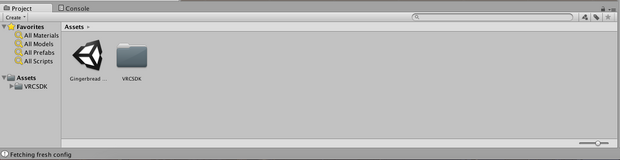
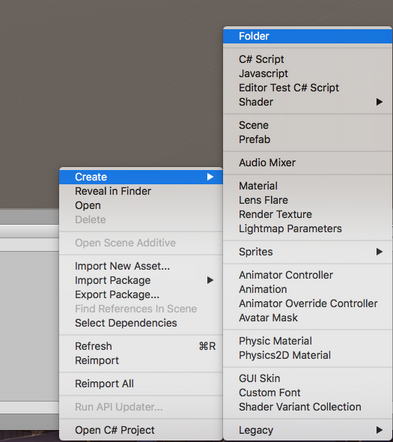
Now, we're going to correct click in the blank space next to our VRCSDK folder icon, and go to Create -> Folder. This'll make a new folder, we'll call information technology GingerBread.
At present y'all're just going to desire to double click on that GingerBread (or whichever other name you accept for information technology) folder, and you'll meet a blank gray expanse now where your items used to be. Y'all've now navigated inside the folder. We're now going to take our downloaded Mixamo .FBX file and drag and drop it right into that blank space.
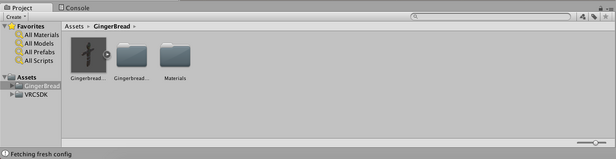
As you tin come across, this has created a file for the model, likewise equally two folders, one for the Unity materials, and another for his photo textures. However, he'south still not quite fix to exist animated in VR Chat. Nosotros're next going to demand to single click on that model file (the i with a photo of our Gingerbread Man), and then check the bar on the right side. If you lot aren't on the "Rig" settings page, only click the button labeled "Rig".
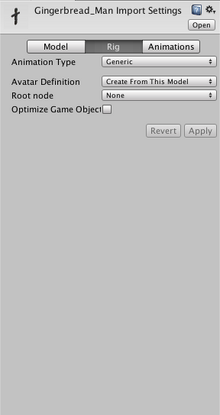
At present you'll notice that under the "Animation Type" section, it says "Generic". Unfortunately, this isn't the type of animation VR Chat wants, but fortunately, changing it isn't hard at all. We're just going to click where it says Generic, and alter that to "Humanoid". And so all that'due south left is to hitting "Apply". Y'all should see a check mark well-nigh the button labeled "Configure..."
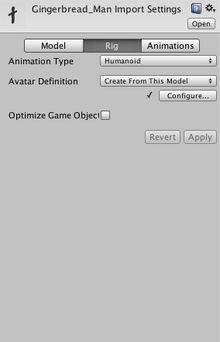
But before you lot continue you will want to click on configure next to make certain the basic were all assigned to the right place, which sometimes they might get a flake mixed up depending on how much you lot've personalized the rig.
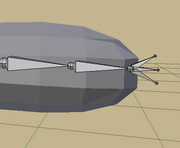
One matter to proceed in mind is if you wish to take IK, to allow your avatar curve and motility a flake more properly instead of sliding around across the floor, it'll need to take finger bones set, which, if your model lacks fingers, you can easily add unweighted dummy bones to the cease of the mitt bone in programs such as Blender/Maya/etc as you only demand three of them and that's the Thumb, Index, and Middle, every bit I've washed below.
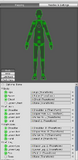
To set the fingers, you'll want to swap through the Left Hand/Correct Mitt buttons pictured in a higher place in the config window, and y'all'll be met with these options

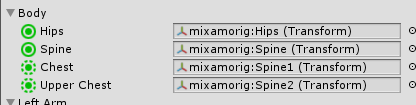
Depending on how your model is fix, all those slots, or even some of the slots will be empty. If your model lacks fingers, equally I said before, all you demand at minium is the root bones, or as they're named in the config window, the Proximal bones, specifically for the Thumb, Index, and Centre finger. Also, within the config mode, there's four slots under Body. Hips, Spine, Chest, and Upper Breast.
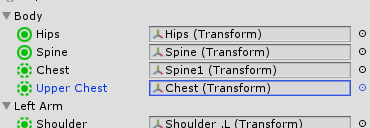
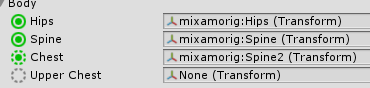
The two slots you lot demand to keep in mind is Chest and Upper Chest. The IK doesn't register the Upper Chest slot and you lot will need to leave that i prepare to none, which you can practice by clicking on the small black dot to the side of it, And so make certain the Breast slot has the highest spine bone fix to information technology that the neck and shoulders connect to. For case, if you used the motorcar-rigger from Mixamo, information technology will exist named Spine2.
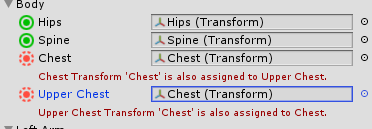
Otherwise yous'll go this error when you try to upload

In one case yous've done that, this
Should become this
Proceed in heed if at that place's a bone set to more than one slot, you'll most likely meet something like this picture below, which is simple to fix as you may notice, the red text mentions the other slot it'due south ready to, information technology'll be upwardly to you to determine which i is in the right spot. For the example provided, I would simply change Upper Breast to none.
Our next stride is going to be dropping our newly setup model into the Unity window so we tin can see information technology, fixing any missing textures, and making sure it's the correct size before we upload the Avatar to VR Chat!
Step Iv: Turning our Model into an Avatar [ ]
So now we have a fully rigged Mixamo model, set as a Humanoid, into a Unity project with the VR Chat SDK inside. Great stuff! At present's the time to really get that model set to be an Avatar!
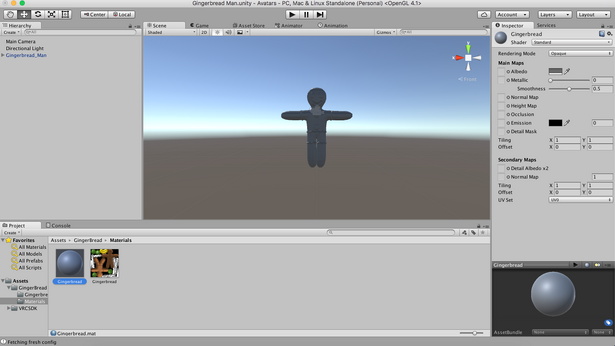
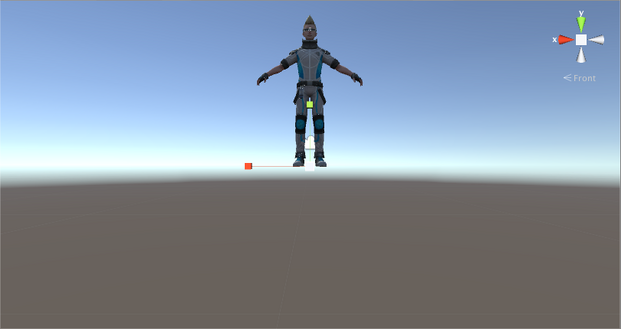
Our offset step is an easy one, just take your model (in our case the Gingerbread Human), and drib him correct into the viewer window (The one with the grid).
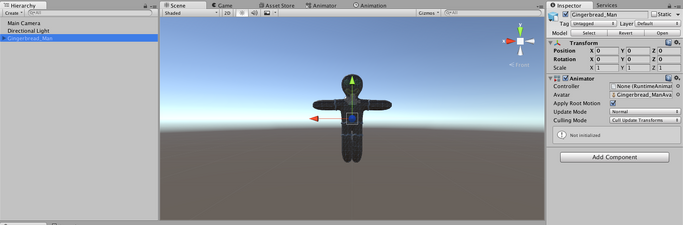
You should be able to see him like in the photo to a higher place in your project, if not, try clicking his proper name in the left bar, and in the right bar (the inspector), under the Transform, change the X, Y, and Z position numbers to 0, like in the photo. If yous still are having problem seeing him, try double clicking his name in the left bar.
So now we've got him in our projection! But what if the model you put in has no textures? Luckily, that's an piece of cake fix too!
Fixing Missing/Weird Textures [ ]
So let'south say our Gingerbread human being looks silvery-greyness when we put him into our viewer. In the bottom section of your Unity project (the Project Browser), yous're going to desire to become into that GingerBread folder we created earlier, and and then Materials. Chances are, yous'll see something like this:
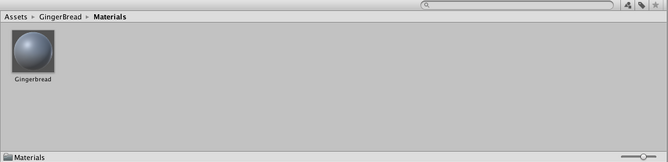
This means that it couldn't detect the prototype for your character's textures. So what we're going to want to do is find that image in your original model files (in our case, the Gingerbread Man files we got from Models Resources). Inside those files, nosotros detect our Gingerbread.png, which are his textures. Some characters may have multiple textures and materials, then you will have to friction match them up a flake if the textures are missing from your Mixamo model.
Now, let'southward just quick drag that image file correct into the materials folder in Unity's browser.
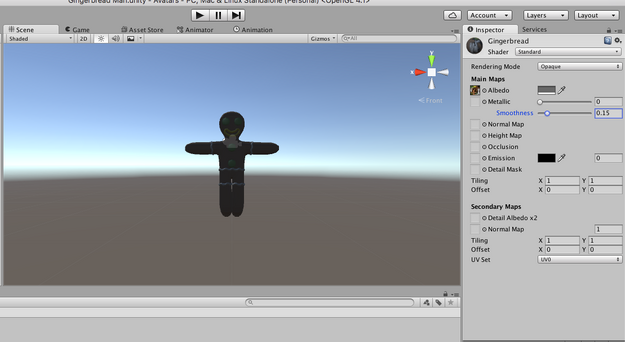
And we're going to want to click on the Blank Fabric file, in this case the highlighted grayness circumvolve above. You'll run across a section in the right bar labeled "Albedo", all you'll need to do is drag your image file from the browser into the box to the left of that word, "Albedo". Once yous do, our friend the Gingerbread homo will look quite a bit more colorful. While you lot're in here, it's generally recommended to turn the "Smoothness" slider down to something less, perchance a .15. This stops the model from looking a bit besides shiny or plasticky when in VR Chat. Although it's totally appropriate if that's the look you air current upwardly going for for your Avatar.
Resizing your Model [ ]
With our model in here, we're very close to uploading it to VR Chat. Even so, we've got to make certain that it's as tall or as short equally nosotros desire it to exist once it gets in there, so we're going to compare it to something that's already sized for VR Conversation. We're going to desire to go into our Asset Browser, and then click on the VRCSDK binder in our sidebar.
Now we want to get into the Examples folder, so Scenes. Inside is a file called "Instance-Avatars.unity", we're going to take that and elevate and drop it into the viewer sidebar right under the Gingerbread Man's proper name.
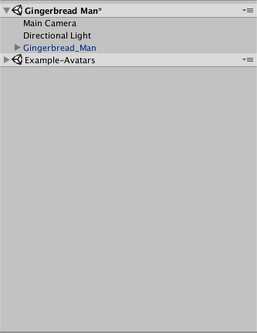
Once you do, you'll notice that a sample avatar is in the project, and in this case, well-
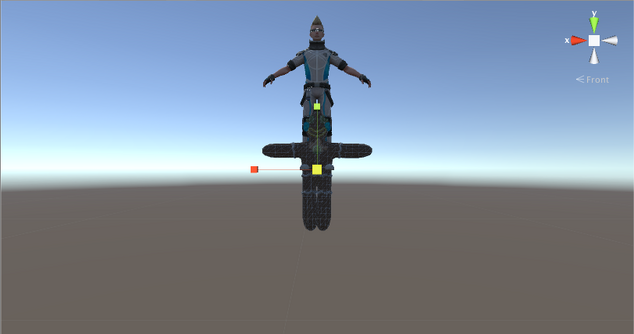
He's quite a bit bigger than our tiny Gingerbread Man! No good! And then nosotros're going to need to make the Gingerbread Man larger! In the top left of the Unity screen are five tools, you're going to want to option the "Scale" tool, which has an icon of a box with four arrows coming out of it.

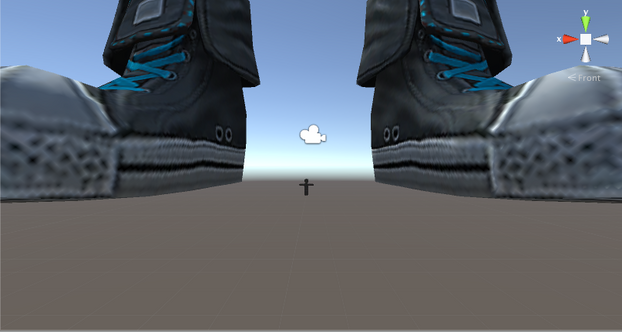
Adjacent we'll select our Gingerbread Man, and when the mouse is over the viewer section in one case again, coil down to zoom out. You'll see a couple of colored squares around our tiny, tiny Gingerbread Man.
We're going to use the white i (the box in the very center), click it, and and then motility your mouse up, watching the Gingerbread Man grow to our liking. Ideally, you're going to want to shoot for about the size of the sample avatar, but if you want him to be shorter or taller, that's your choice as well. You may have him size up with his feet quite a bit lower than the sample avatar, like in this photo:
If that's the case, just click the Move Tool (The four arrows pointing out from one another, forming a cross), and the little scale boxes will turn into arrows. We're going to employ the up pointing pointer to motion our model up.

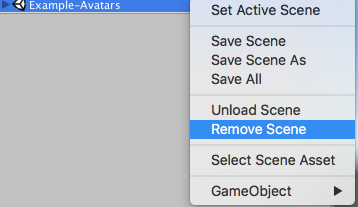
Once you've got the model exactly how yous want information technology, you can remove the sample avatar from the viewer by right clicking its name in the left bar, and selecting "Remove Scene"
Alright, we're almost done! I'll bet y'all're pretty excited to get this model into VR Chat, so let'south practise it!
Pace 5: Calculation the Avatar Descriptor and Uploading to VR Chat [ ]
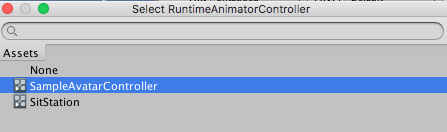
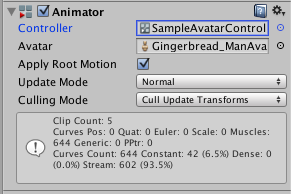
Awesome, then we've got ourselves a great looking model and are ready to upload it as an avatar. The outset thing we're going to want to do is click on our Gingerbread Man's proper name in the left bar, then await over at his options in the right bar. Nether the Animator department, you'll see an option labeled "Controller", it should be ready to None past default. Nosotros're going to change that by clicking the circumvolve on its correct, and selecting "SampleAvatarController".

Now that nosotros've done that, nosotros're going to add the "Avatar Descriptor" to our model. This will tell VR Conversation that what we have is, in fact, an avatar. It'll too tell it where the optics are then it knows where you'll exist seeing from while in VR!
Adding the Avatar Descriptor [ ]
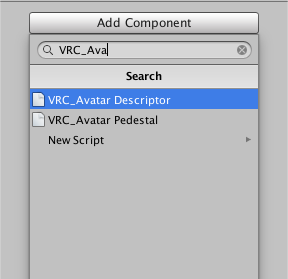
Still in the right bar, we're going to want to click on the big "Add Component" button at the lesser, and and so search for VRC_Avatar. We're then going to click on VRC_Avatar Descriptor.
Now you'll see a new section added under the Animator section that we edited in the previous pace. This'll have a ton of options to configure. Luckily, nosotros only really need to configure one or ii of them.
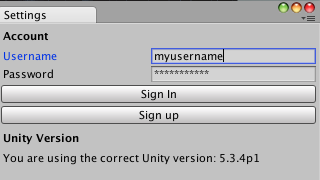
Yet, earlier we do and so, at present's a skilful time to log into the VR Chat SDK. Right under the new "Pipeline Manager" section, you'll see a "Login" button. Click that, and a new window volition open. Use that to enter your VR Chat username and countersign, make sure it'south the exact same info you apply to log in and employ VR Conversation.
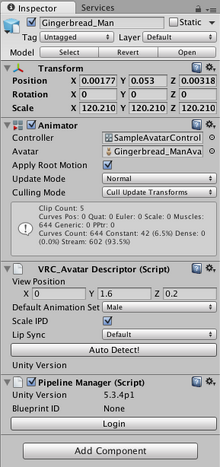
Now we'll close out of that window and refocus ourselves back on that Avatar Descriptor section. Showtime, check out the "Default Animation Ready" selection. If your model is a Male or masculine, exit it ready to Male. If not, you lot can alter it to Female. The next matter we'll check out is the View Position section. This is going to exist where we tell VR Chat where the eyes are.
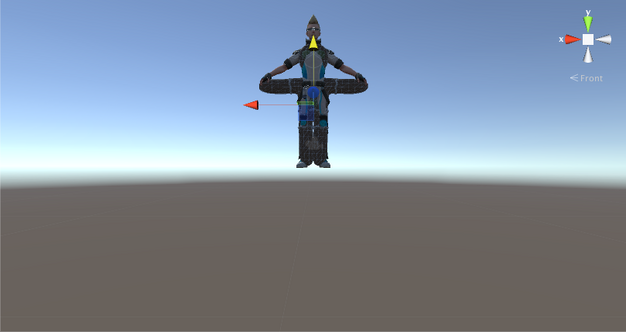
The first thing we tin can do to make this easier is take a look at our viewer window. You'll see a shape that sort of looks like a cross, and information technology should say "Front" under it.

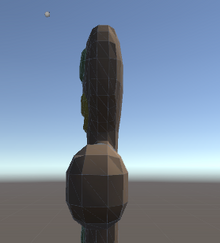
This symbol will allow u.s.a. to move around our view then we can run across the character from the side. Click the right arrow to be moved around to a side view of your avatar. You'll notice a white ball, floating somewhere in front of your graphic symbol. Typically it'll be a niggling too loftier or sometimes even a niggling too low. This is your character's eye marking. Looking at your View Position, the only option you'll probable demand to change is the Y setting, which moves that dot upwardly and down. Every so often you may need to change the z to motility information technology in or out, but for now we'll just stick with Y.
If you need the white dot to go lower, yous're going to want to change the number in the Y box to something lower by a few points, say from ane.six to 1.four. If you need information technology to go higher, you tin heighten that number. In one case y'all change it, the white dot will move (it may accept a few seconds for the dot to catch up). You're going to want that white dot to be in front of the avatar'due south eyes, almost where a VR headset would be if they were wearing one.
Hither is my Gingerbread man with the Y set to 1.6. Notice how it'due south fashion too high, and nowhere near his eyes.
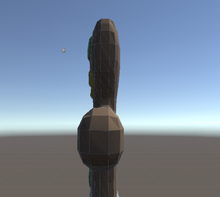
Now here he is again, but with that Y adapted to one.four. Looks much amend.
Once you lot've got that set to what you want it to, you lot're all set up to upload information technology to VR Chat! Let's get this going on, shall we?
Uploading to VR Chat [ ]
This part is by far the most easy matter yous'll do. You just want to go to the "VRChat SDK" choice in the top bar, then go to "Show Build Control Panel". A new window volition pop upwards. If you don't see any errors, y'all're going to want to hit the "Build and Publish" button.

One time you do, it'll accept a few minutes to create the file. If it asks you what to name the new VRC Avatar file, or if you'd similar to proper noun the project, absolutely do. Proper name it whatever y'all'd like and hitting okay.
Then it'll accept you to the concluding upload screen, which looks like this:
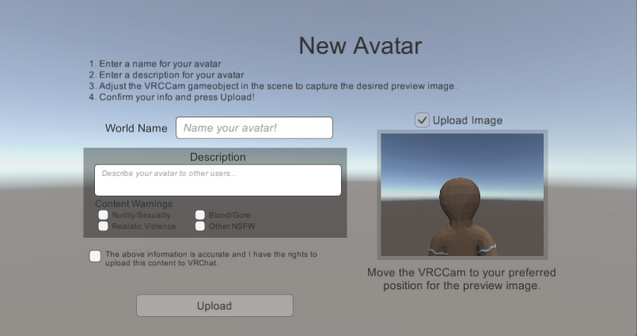
Notice that the photo of our Gingerbread Man has him facing backwards, definitely non what nosotros want. An easy prepare for that is to click on his name in the left bar and modify under "Rotation", change his Y to 180.

Adjacent, we'll enter a name for him in the summit box, let's go with Gingy. Come up with a clever description and pop that into the description box, and so mark if there is any NSFW content in your avatar.

Once yous're all done, just check the "I agree" cheque box, and hit the upload push. In a few moments, y'all'll become a confirmation proverb that your first avatar has been successfully uploaded to VR Chat! Congratulations!
If you'd similar to stay effectually, brand sure to check out our Quick Starting time for Worlds tutorial too!
Source: https://vrchat.fandom.com/wiki/Quick_Start_-_Mixamo_Avatar_Creation
0 Response to "How to Make Sure Avatars Upload to Mixamo"
إرسال تعليق